2. Beverage Maker#
— SCSS + TypeScript
In this assignment, you will build a small interactive “Beverage Maker” web app using TypeScript and Sass (SCSS). The page includes a mug graphic and several option groups (temperature, base beverage, syrup, cream). Your job is to complete the missing SCSS mixin and finish the TypeScript functions so the UI updates correctly when the user changes options.
2.1. Objectives#
By completing this assignment, you will practice:
SCSS Mixins: Refactor repeated styles into an SCSS mixin and reuse it with
@include.DOM Events: Use
addEventListener("change", ...)to react to radio button selection changes.DOM Manipulation: Update element classes and styles to reflect user choices.
CSS Variables: Use CSS custom properties (for example
--syrup-color) to connect TypeScript state to CSS styling.
2.2. Best Solutions#
Section 01
Section 02
2.3. Preparation#
IDE Setup: Use VS Code for editing and managing your code.
Development Environment:
NodeJS Environment Setup: Choose one of the following options to set up your NodeJS environment,
Docker Container: Create a Node.js development environment with Docker. For detailed instructions, please refer to the class slides.
Direct Install: Alternatively, you can install NodeJS directly from the NodeJS official website.
In the context of this document, the term
terminalrefers to:Command Prompt: On Windows systems.
Terminal: On macOS systems.
Shell or Bash: Inside a Docker container, depending on the base image of the container.
Verify the installation by execute the command in
terminal:node -v # v14 or newer npm -v # v8 or newer
GitHub Setup:
Create a GitHub account if you don’t have one.
Ensure you can access your GitHub account using an SSH Key. If you haven’t set this up, follow the steps below or check this tutorial.
Open a
terminal. If you haven’t yet configured an SSH key for GitHub on your machine, generate a new one with the following command:ssh-keygen
Navigate to your GitHub account settings(web). Click on
SSH and GPG keysand thenNew SSH key. Paste the public key that was generated in the first step and clickAdd SSH key.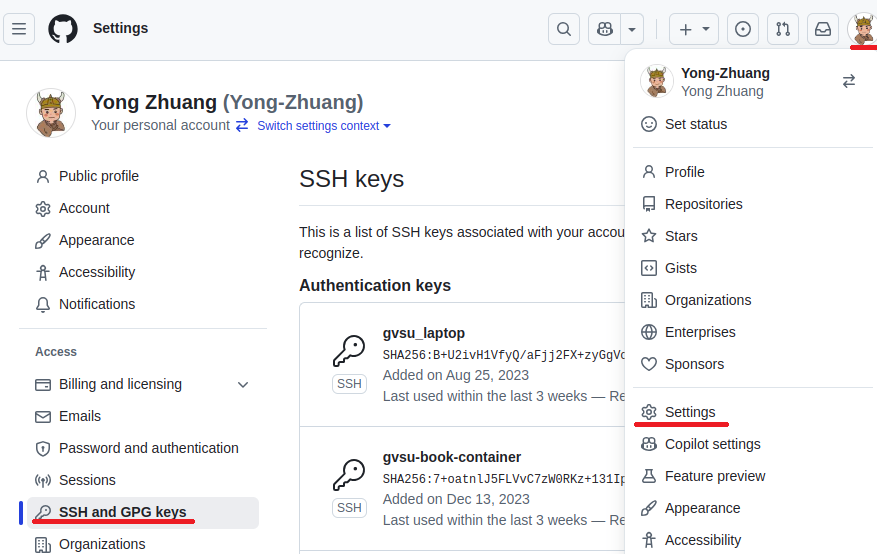
Set up your GitHub username and email in a `terminal``. You can do this with the following commands:
 git config --global user.name "Your Name"
 git config --global user.email "your-email@example.com"
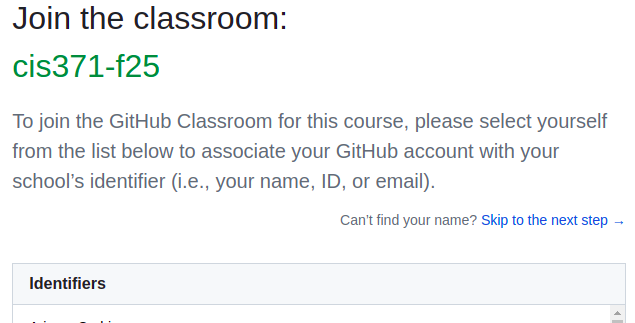
Accept your instructor’s GitHub classroom invitation to set up your project repository.
Select Your Name:
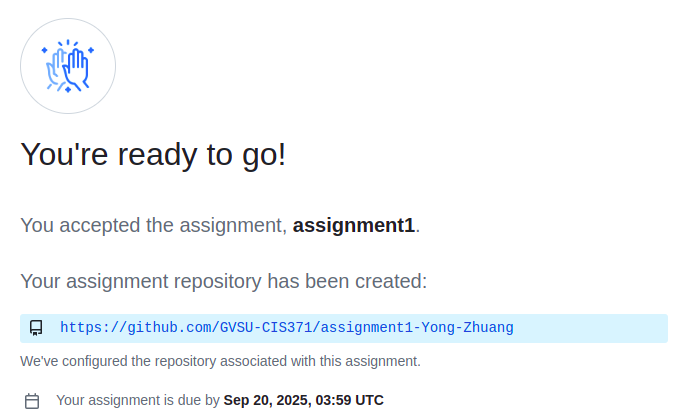
Initialize Your Assignment Repository:
Clone the Repository:
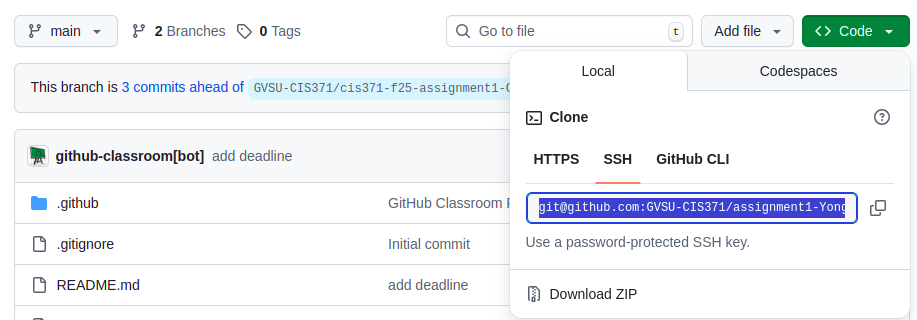 You’re now ready to clone the repository. In your
 terminal, use the following command with your SSH repository link to download the repository to your local machine:git clone [YOUR_SSH_REPO_LINK]
Install Required Packages: Execute the following command to install the necessary packages for your project:
cd [YOUR_REPO]
npm install
Run a local development server (default port 5173):
npm run dev
Then you can access your project at
localhost:5173in browser.
2.4. Instructions#
2.4.1. Task 1: SCSS mixin in src/style.scss#
In src/style.scss, you will see a .syrup style block that contains a repeating linear gradient with a hard-coded color (for example #ffefd5).
Refactor this syrup styling into a mixin:
Create an SCSS mixin named
syrup-layer.The mixin must accept one parameter: the stripe color (for example
$color).Replace the hard-coded color in the gradient with
$color.Update
.syrupto use the mixin via@include.
Goal: changing the syrup stripe color should require changing only one argument, without copying the gradient code.
2.4.2. Task 2: Syrup behavior in src/main.ts#
Complete the following functions:
function applySyrup(input: HTMLInputElement): void {
  // TODO: implement this function
}

function setupSyrupListeners(): void {
  // TODO: implement this function
}

setupSyrupListeners();
applySyrup behavior:
When the user selects a syrup option, update the syrup layer in the mug.
Use the
syrupscolor map (provided in starter code) to look up the selected syrup color.Set CSS variable
--syrup-coloron the.syrupelement so SCSS can use it. For how to set a CSS variable in JavaScript, please refer to the following documentation: https://developer.mozilla.org/en-US/docs/Web/CSS/Guides/Cascading_variables/Using_custom_properties
setupSyrupListeners requirements:
Add
"change"event listeners to all syrup radios:input[name="syrup"].On page load, apply the initial syrup state using the currently checked radio.
2.4.3. Task 3: Temperature, cream, and base behavior in src/main.ts#
Complete the following functions:
function setupCreamListeners(): void {
  // TODO: implement this function
}
setupCreamListeners();

function setupTemperatureListeners(): void {
  // TODO: implement this function
}
setupTemperatureListeners();

function setupBaseListeners(): void {
  // TODO: implement this function
}
setupBaseListeners();
Required behavior:
2.4.3.1. Temperature#
Add
"change"listeners toinput[name="temperature"].When a temperature radio changes, call the provided
applyTemperature(input)function.On page load, call
applyTemperature()once using the currently checked temperature radio.
2.4.3.2. Cream#
Add
"change"listeners toinput[name="cream"].When a cream radio changes, call the provided
applyCream(input)function.On page load, call
applyCream()once using the currently checked cream radio.
2.4.3.3. Base beverage#
Add
"change"listeners toinput[name="base"].When a base radio changes, call the provided
applyBase(input)function.On page load, call
applyBase()once using the currently checked base radio.
2.4.3.4. Expected Outcome#
2.5. Grading Rubric#
Category |
Points |
|---|---|
GitHub setup, commits, push, & GitHub Pages deployment |
15 |
Task 1: SCSS mixin (syrup-layer) in src/style.scss |
25 |
Task 2: Syrup functions in src/main.ts |
25 |
Task 3: Cream + Temperature + Base listeners in main.ts |
25 |
Code quality & organization |
10 |
Total |
100 |
2.6. Deliverables#
Deploy your web application using the following commands in your
terminal:npm run build npm run deploy
Github Page Setup
Set up your GitHub repository for GitHub Pages deployment. Follow the steps shown in the image below:
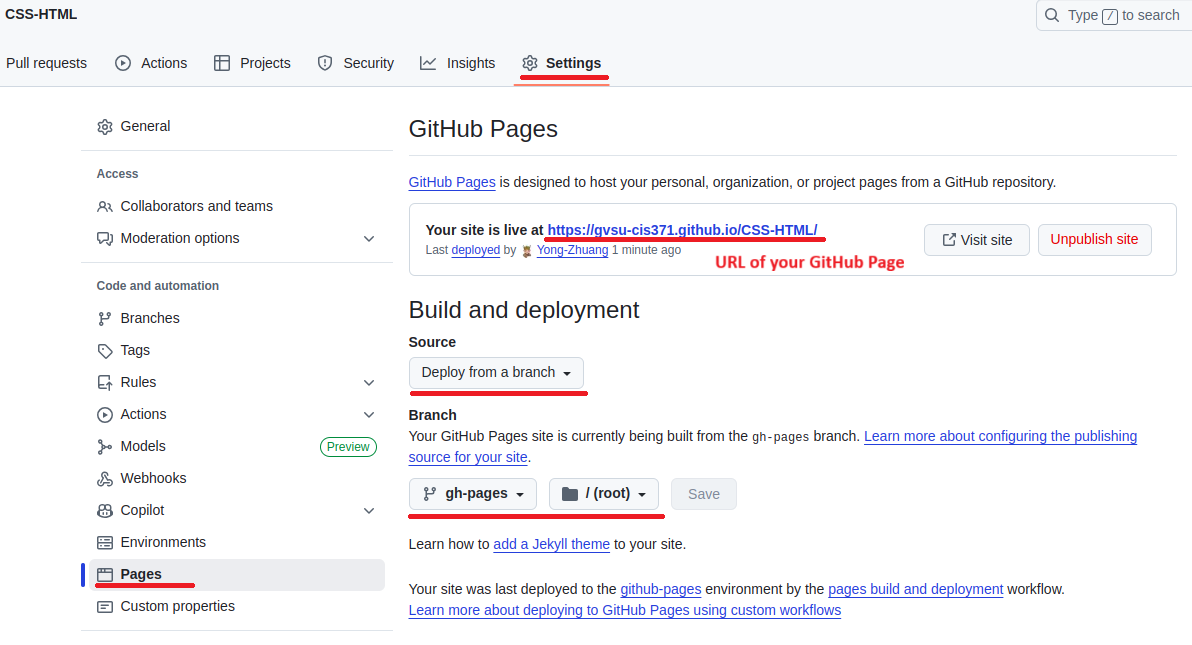 .
.Your web application will be accessible at the URL: gvsu-cis658.github.io/YOUR-REPO
Submit the URL of your GitHub Page in Blackboard.